The box of bodies I bought off of the MH$B arrived a few days ago, and I dove right in.
 This is the Amber stock horse foal mold. Traditional sized.
I got her in the lot nearly original, just missing her head. She had some notes written on her from Grace (the lady I purchased her from in the lot), but was pretty much the way you see her here.

This was my very first venture into Customizing Breyers. I had NO idea what I was doing, but with some helpful guides, and lots of reading online, I think I managed to do Ok.
 I removed her tail, and cut some more slits in her neck. After I cut the slits, I took a (KIDS DON'T TRY THIS AT HOME) long handled lighter, and pretty much set her neck on fire. I *know* you are supposed to heat them with a heat gun or other forms of non-flame heat, but it was all I had at the time, since I have to do this outside. Thats her head there by my fingers.
 While the neck was hot, I moved it a little bit more off to the side, so she'd be looking almost all the way behind her. While I was at it, I needed to reposition that right ear, so off it went.
I'll interrupt here and mention that when its recommended to wear eye protection when Dremeling - do it. Those tiny little chips of plastic that fly off are not only hot, but they sure HURT when they hit your eyeball! (And yes, I now have my very own pair of safety goggles.)
 So this is what the neck looked like after some Amazing Sculpt from Unbridled, Inc. (Its in the background for the unintentional product placement lol.)
 Next we have a tail, and the hint of a crease down her back.
I should also mention that I cut off the original mane too.

 That head was a devil to put back on. Nothing I did would keep it in place - finally I took a piece of foil and folded it so it would fit snugly into both the hollow head and neck areas, and super glued it that way. The problem was it kept slipping no matter how long I held the head in place with whatever bonding agent. Lesson learned there! Once the quick set glue cured, I was able to go back in and fill with the Amazing Sculpt. Added a tail and a mane, and reattached the ear/filled in the hole where the ear was. I turned the ear just slightly more backward.
 And she becomes a he! I also added some detail to the bottom of the hooves, but don't laugh - it was my first time sculpting frogs, and while they are passable, I wouldn't consider them perfect by any means. :) I also fixed ear tips, re-sculpted the muzzle, and touched up a few tiny other spots.
And the finished colt! Lots and lots and lots of sanding later - literally 4 hours worth Sunday afternoon with 2 redbox movies. Every cranny, bump, possible pockmark, everything I could see and some I couldn't. Several (lost count at 10) thin coats of primer to cover all those leftover brown spots also. I followed Danielle Feldman's Art of Prepping DVD as closely as I could, scrubbing with Comet and sanding carefully in-between coats of primer.

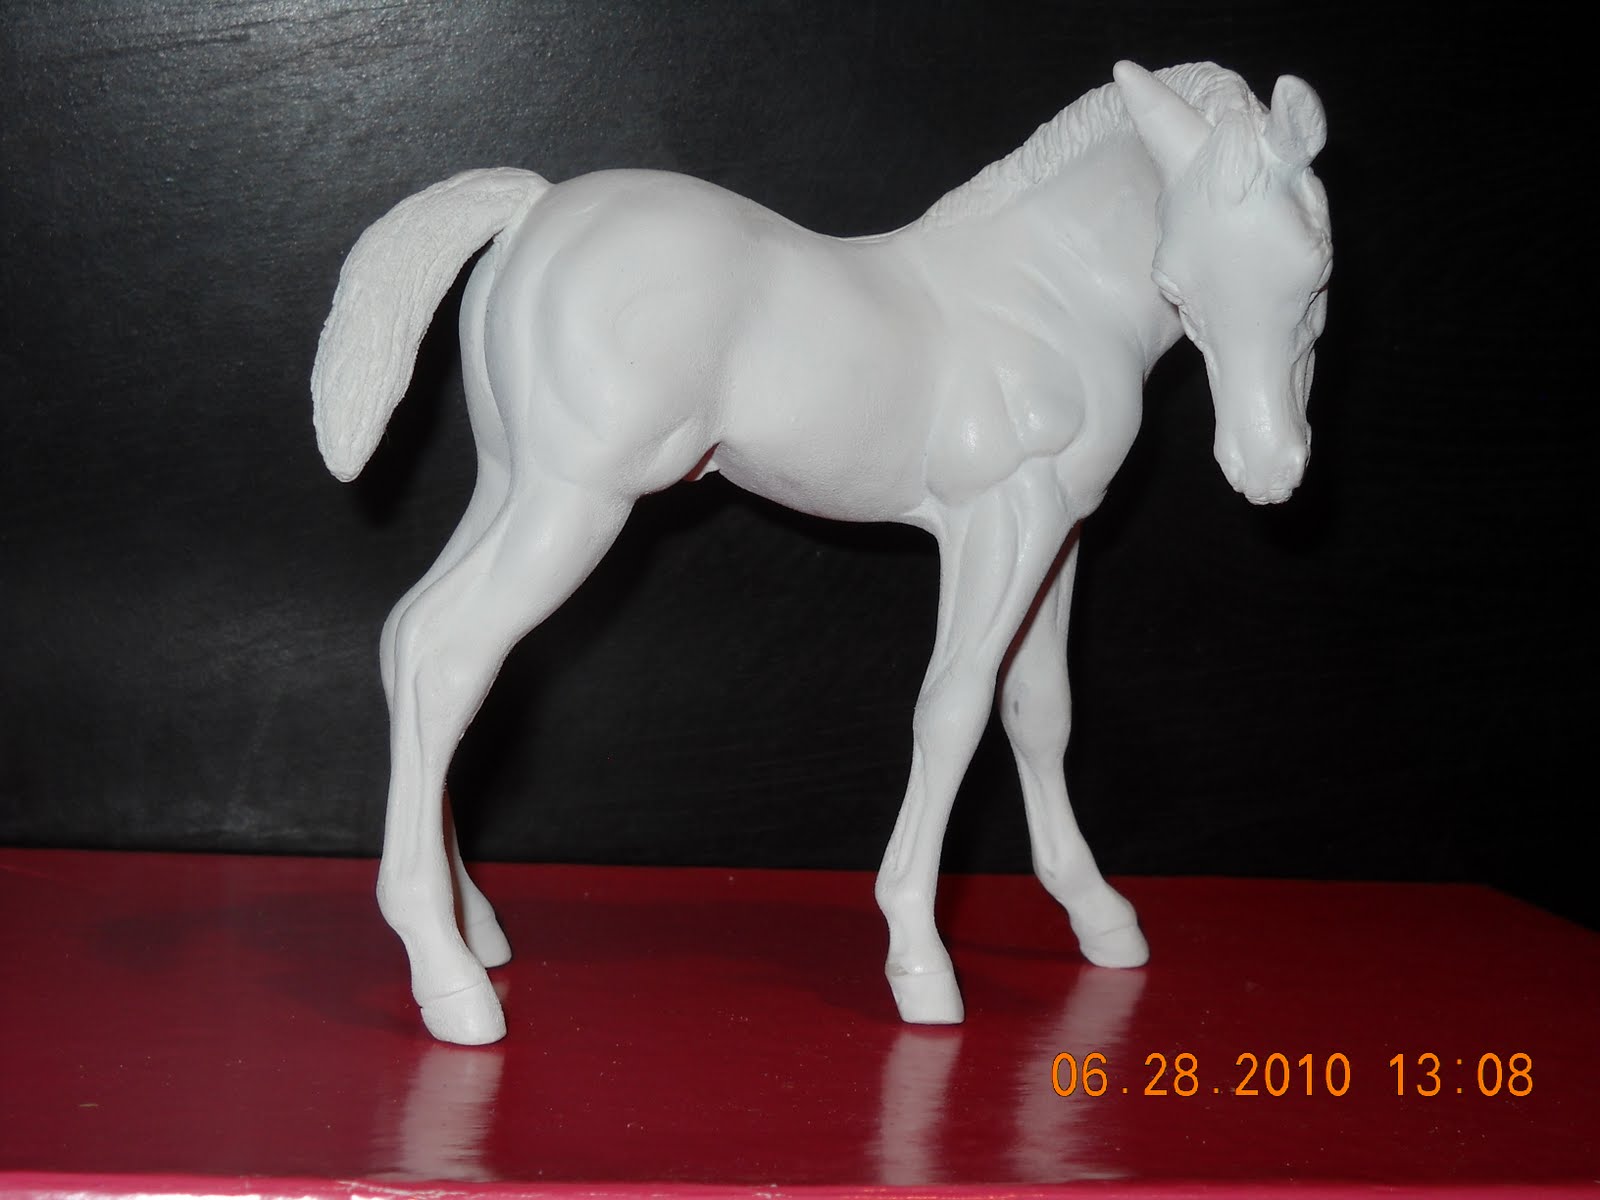


I sanded about another hour after these were taken, so the few areas where it looks to be a bit rough, aren't so much anymore. I also see now that the front leg is slightly bent more forward at the knee than would be ideal, but that would take more work to strip, fix, and re-prime and I'm not so sure I want to go that route.
I am debating on whether to try my hand at painting or try to sell as is. If I paint, I see a splash black and white paint pattern - but for the first time out, I'm not so sure about the complexities of that.
I am debating on whether to try my hand at painting or try to sell as is. If I paint, I see a splash black and white paint pattern - but for the first time out, I'm not so sure about the complexities of that.
No comments:
Post a Comment