Tuesday, June 29, 2010

New Addition!

I've been invaded by a small white thing - fluffy and adorable. 

This is KohKoh. I think thats her name anyways. The kids change their mind every other second, but thats what they keep going back too. (Better than Muffins or Cupcake!)

Yes, the time on the picture is correct. See, a couple of days ago the boyfriend tells me to come outside to go see something. I'm up watching tv due to insomnia, and figured why the heck not. Cooler outside than inside anyways.

He grabs a small can of wet cat food, and sets it outside in our open carport. After a short wait, this is what comes scampering out from under his Dodge Truck.

We live in an area chock full with half feral and otherwise 'tame' cats that roam the neighborhood - kittens are fairly commonplace.

What is NOT commonplace is for one of those feral kittens to walk right up to a human as careless as you please and start asking for attention! Which, coincidently, is just about what this one did. 

We watch it demolish half of the small pop-top can and the Boyfriend wonders out loud if we can pick it up. I look at him, smirk, walk over to it, and scoop it right up, thank you very much. (I come from a LONG line of female cat-whisperers!). It doesn't fight, just settles right in, starts rubbing its tiny nose on my chin and neck, and starts purring as loudly as it can. 

Eya. 

I need another cat like I need another hole in the head. However, one little affectionate nose rub and that was it. Thats all it took. I was done in - hook, line, and sinker. 

The Princess on the Purple Pillow is here to stay, Methinks. KohKoh, meet the world. World, meet KohKoh.

Well, maybe after she wakes up.

Monday, June 21, 2010

Early Work

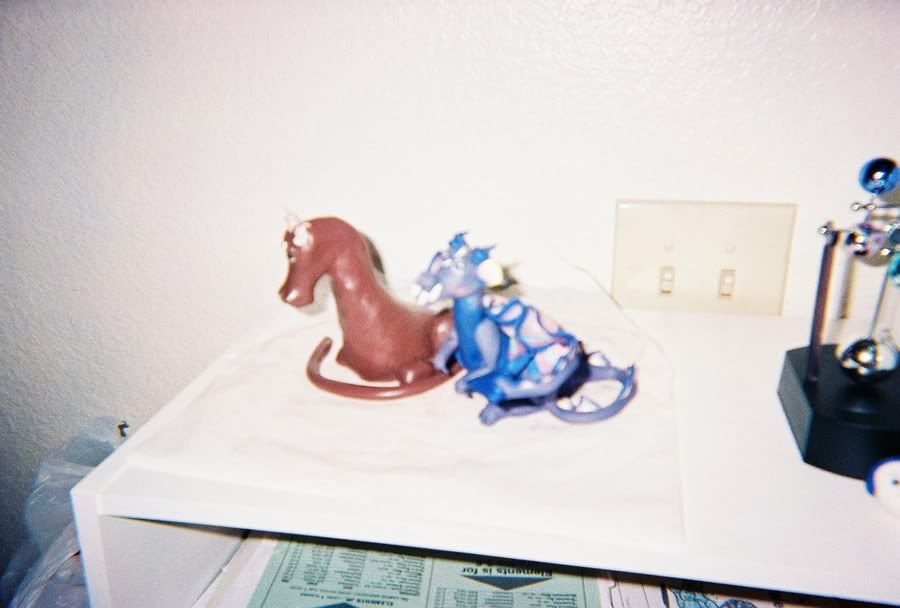
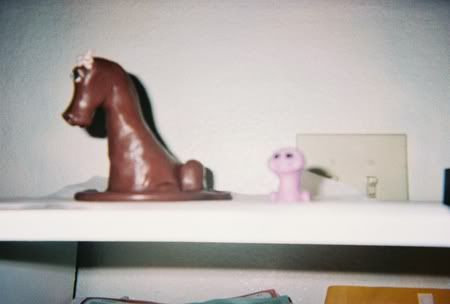
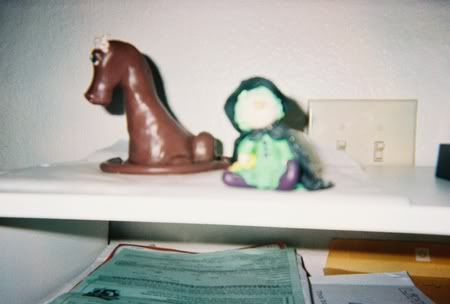
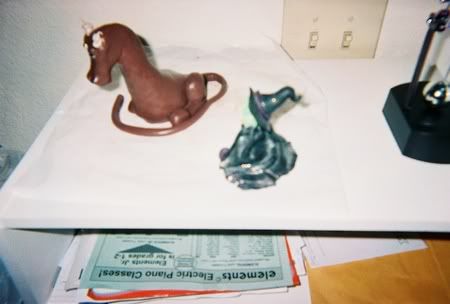
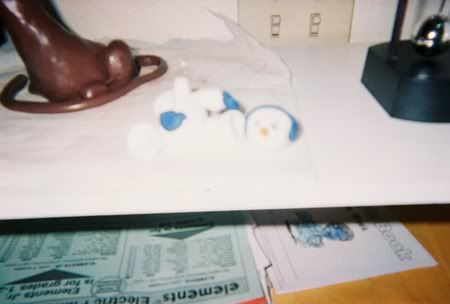
I apologize for the pictures here. I was using a very cheap, disposable, point and shoot camera and this is what came of it. I meant to go back and get better pictures, but I never did. 


Blue and Brown were created in 2006, I believe?


To the right, the brown blob, was supposed to be the 'brother' to the finished blue dragon. He never got finished, and shortly after these were taken, I had to move out of that apartment, and put some boxes in to storage. The box that held him somehow accidentally got put into storage, and when I finally found him some long, hot, months later, he was a giant mess, half baked, half cracked, smooshed in other places from the other items in the box - so he ended up being thrown away. 


The blue dragon with the rainbow scales and wings was my very first dragon. 

He taught me mostly what NOT to do with polymer clay in larger forms such as this. 

See, the book I was creating him from was meant for kids. I bought it because it had him in it. The major fatal flaw for Blue there was the instructions say to make his body solid. I was making him about 2-3 times larger than the scale in the book, so his body is solid clay. 


At the base of his tail, he's about 3 inches thick. Thats a lot of polymer clay to bake at one time. His tail is a lot thinner, as you can see here, and many of his other parts, the scales down his back, his teeth, his horns, are also a lot thinner. 


When I baked him, he was in the oven for about an hour. I know now that wasn't nearly long enough. If you look closely in that last picture, you'll see on his one side a large ear, but on the other, no ear at all. Thats because when you under bake polymer clay, it crumbles as it cools. The polymer is only half way bonded, leaving the finished piece weak and very fragile. 


Thats what happened to old Blue. 


He broke into about 15 pieces within a week after baking him. Tail snapped into thirds, all his scales came off, his teeth broke, he lost both arms, part of both legs, and finally, his head broke from his body. This was while he was sitting here on the shelf, next to my kitchen appliances, just like he was pictured here. This was his display spot, and after I took these pictures he just started crumbling apart. I couldn't fix him because the pieces that came off, just turned into smaller bits of crumbly clay.


RIP Blue. You had a short life, but you had friends while here.


Little pinky and Brown. I didn't make pinky. Don't remember where I got her though.

You can't see her face, but that was Ms. Witch. She had lime green hair that was formed by squishing the clay out of a clay gun extruder. Her hat and cape were made from black clay mixed with irridescent glitter for bling. She was given a pumpkin candy bucket, but the pumpkin burned while baking. Early mistakes are the ones you learn the most from. Was a lot of fun making her.


Again, hard to see the sparkles. But they are there. She has chipped some over the last few years, but is still intact.


Mr. Snowman there was still in progress. I finished him then sold him a few weeks later to one of my co-workers who collected snowmen. No idea if he's in one piece anymore or not. 


So this past week, after finally digging up the password to the photobucket account all the above images are stored in, I did some shopping, reading, thinking, and then more shopping. 

Rather disturbing picture, isn't it? I especially like the drafter that has a blue wire for a neck, and the pinto without the head. Well, they be mine, as soon as I can get off to the post office and mail out the money order for them.

Yes, I bought broken toys. On purpose.

What am I going to do with them, you ask? 

Ah, that will be for the NEXT blog post.

At the same time as I was looking at these from the MH$B , I also bought stuff to repair them. Amazing Apoxie Sculpt is also on its way, as well as a DVD I can NOT WAIT to get here, a Model Horse Prepping Instructional CD from Feldman Studios. There is also a booklet on how to make model horse halters and a traditional PAM coming from ebay too. 

I also got a new pasta machine from Sculpey, to replace the one I had that no longer had a crank handle (another reason for a year of no sculpting) for $13 at Joanns!

I also received the two books previously mentioned, and have already spent hours pouring over them, learning and memorizing. 

The Amazing Apoxie will not just be for repairing and rescuplting the bodies above, but it is also a sculpting medium in its own right, and I'm hoping that I can use it to create prototypes for lots of other things to be cast into resin. 

The baby steps are on their way - and progress is being made. I'm hoping to have some actual work done on the dragon and the bodies pictured above by mid July.

Sunday, May 23, 2010

Book Details

As mentioned previously, I ordered two books from Borders' Marketplace online, which is their used book site. I had gone into my local Borders (I should be BANNED from that place lol) to see what they had in the way of instructional books on making molds and castings from sculptures. I was highly disappointed in their artists section. The majority of what they had was coffee table books - in which I had a LOT of fun flipping through - but not quite what I wanted. 


So, off to one of their computers to look at what they offer online. Yes, I could have done this at home, but I was already there, and why not. 


So, after about 20 minutes of searching, I found exactly what I was looking for. 


Book 1. 


The Art of Resin Jewelry (DVD Edition): Layering, Casting, and Mixed Media Techniques for Creating Vintage to Contemporary Designs


A top-selling favorite returns--now with a DVD featuring Sherri Haab!

* The Art of Resin Jewelry has sold 14,000 copies
* Value-added DVD includes three all-new projects plus a special bonus gallery of jewelry
* How-tos for combining resin with polymer clay for mixed media and moldmaking

The best-selling book on resin jewelry returns--now with an exciting bonus DVD featuring author Sherri Haab! The Art of Resin Jewelry still features the same great step-by-step directions for creating beautiful necklaces, pins, bangles, bracelets, earrings, and rings with affordable, approachable resin. Instructions show how to add colorants and other materials, how to cast three-dimensional forms, and how to combine resin with polymer clay for entirely new effects. And now this classic title comes packaged with an exclusive DVD, ready to light up screens across the country with three all-new projects plus a special gallery of inspiring jewelry designs. Now it’s even easier for crafters at every level to create stunning resin jewelry--by watching an expert demonstrate her own signature techniques.


Yay! I get both the book AND the instructional DVD for under $10.00! Whether the book is used or not doesn't matter to me one smidgen. 


This book hopefully will teach me the 'bread and butter' of what I want to learn to do. Cast in resin using rubber or silicone molding. 


What will I be casting? 


A little bit of everything, I think. With the ultimate goal being sculpture - I also see a need for smaller, easier, faster, and production friendly items that can be sold in bulk cheaply. (Read into that, things that bring in money, hopefully.)


Things like beads. Buttons. Kids things. You get the drift. Things that can be easily customized, painted, and included in other projects such as jewelry making, scrapbooking, steampunk, mixed media artists, etc. There are local farmers markets, craft fairs, school functions, etsy, ebay, and lots of other areas to market and sell at. 


The flip side is by casting the small stuff, It will teach me how to cast the BIG stuff. Having haunted some of the model horse boards, it seems that there are just a very FEW people that cast in bulk for sculptors. Thats a possible career path. The demand is certainly there for someone who wants to simply cast for a living for other people that sculpt. Its definitely something to think about. And its not just the model horse people. Theres several other areas of the sculpting world that one could tap into.


One would certainly have to really know what they are doing before taking on someone else's hard work. 


Book 2.


Mold Making, Casting and Patina

An excellent beginner's book for those who want to make molds, and/or casts in plaster and rubber, but have no prior experience. Format designed to make the text easy to read with step-by-step instruction on all phases of the mold making, casting and patina process. First edition publication with 116 pages of instruction and over 200 photos and line drawings of specific methods and procedures for any mold making and casting project clearly showing everything needed to make exacting casts of original pieces of sculpture. The text also includes guidance in the repair of casts, as well as mounting for display, and the art of patina or coloring. Includes appendices on mixing procedures for plaster, troubleshooting, general information on gypsum products, enlarging, bronze casting. Charts on proportional requirements of materials, weights and measures, and a glossary of terms are also provided. Recommended for the novice sculptor, mold maker and caster.


More of the same - just a bit of an older book that deals with larger sculptures. Some of it won't apply to what I want to do, but the first half of it will/does.


Then, at Half Price Books yesterday, I found this! 


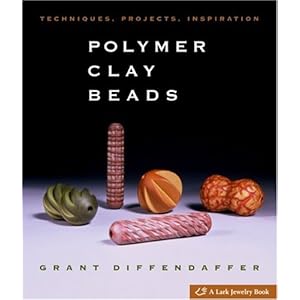
Polymer Clay Beads: Techniques, Projects, Inspiration

Twenty different crafting methods—countless breathtaking beads, all made from easy to work with polymer clay! The varied techniques in this comprehensive skill-building book—many of which have never before been published—range from hand-formed tubes, spheres, wedges, teardrops, and baguettes to traditional mokume gane with fantastic layered effects. Add mica clay to create iridescent “ghost image” beads. Construct veneered pillow beads. Carve beads, press-mold them, or even use a cookie-cutter to get an array of fabulous shapes. Turn and form the bead on an extremely affordable craft lathe. Close-up photos show every step in the process, as well as the completed beads; some also appear as part of a finished piece of jewelry for inspiration. 


This one has some awesome polymer clay techniques that I've never seen before. It also covers the use of using RTF Silicone Rubber to make texture molds, bead molds, and cavity molds. Really neat stuff! 


So I guess after spending hours looking at how to videos, reading blogs written by some well known mold casters in the model horse industry, and a few other things, I need to start casting stuff! 


Well, as soon as I can order the supplies, of course. 


I have some perfect things that will work as test guinea pigs, including one of my daughters Breyer Stablemate sized horses, a Lippy that somewhere broke half a leg off. That should be a great teacher on  how to cast small pieces, undercuts, and delicate legs. 


I am looking forward to this summer like I haven't looked forward to a summer in a long time!

Friday, May 21, 2010

Books Books Books!

I love Borders Used Book marketplace. Just LOVE it. 


I have taken the first steps into the direction where I finally, after years of artistic searching, have decided I need to head. 


That direction is a weird combination of model horse customizing paired with OOAK human sculpture paired with jewlery/bead making paired with mold making and resin casting. 


*Whew!* What a mouthful... 


The books I bought I'll post later on, after I can find images for them. I'm excited - hopefully they should be here in less than 2 weeks. 


Its the first baby steps, but at least I feel as if I'm doing *something*!

Another WIP, Centauress

This is another project I started at or around the same time I started the green dragon. It too, is currently wrapped up in saran wrap, and stored carefully away.

I will warn you, the pictures do contain some semblance of human nudity, so if you are offended, don't read.

I am a member of a message board (ooakguild.com) devoted to artists that work in clay, but create OOAK. OOAK is an industry term for One-Of-A-Kind. I started this for a contest they were holding on the board, but due to the lack of space to work, ability to work without 5 pairs of smaller hands that just HAD to work in the clay at the same time, and the constant distractions of 5 kids all trying to see what you are doing at the same time - not the most conductive situation to getting stuff done.

Ad to that situation the necessity to sculpting female body parts - with pre-tween aged boys around - not the *best* thing to have going on in front of them.

So, again, just like Mr. Green Dragon below, Miss. Centaur got put away too.

The inspiration from this piece was a contest on ooakguild, something to do with taking a character out of a story and turning it into 3-D. I've always just loved the original Fantasia, (Disney), and being a wings and horse nut, the centaur scene has always been my hands down favorite song from the movie. I decided to take one of the adult females and see if I couldn't make her 3-D.


I didn't get pictures of her armature, in progress (except for these) or any of the steps. I wasn't ever planning on putting her up here on the blog, but since I'm bored and looking for things to keep this blog alive, here she is. 


She's my first time sculpting in straight Super Sculpey III, and I'm not so sure I enjoy it. The clay gets super tacky when warm, and after a lot of handling, that tackiness gets really annoying. 


I like the flesh color of the clay though, which is why I kept using it. 


The dragon I baked the head in its own step to keep it from being destroyed while working on the body. Her though... She is still in unbaked form. This may or may not prove to be a major mistake when I go to bake her if I ever finish her. 


For those that aren't familiar with the way Polymer clay works, its a plastic based clay that is pliable, easily kept for long periods of time in its original state, doesn't harden on its own, and when ready to 'cure', can be fired in a regular oven. Temps to cure the clay vary between 250 and 275, so this clay is a very good choice for people like myself who a) can't afford a real kiln; b) don't sculpt full time/as their bread and butter; c) have a lot of smaller projects such as beads, kids projects, and just overall messing around. The clay comes in hundreds of colors, and can be mixed to any color you can possibly think of under the rainbow. Its also very cost effective, with a one pound rectangle of the Super Sculpey III above costing between $10 and $15, depending on retailer. 


Her armature was easy to figure out, but a pain to reinforce. She's got a triple twisted wire spine, with the same twisted wire for the legs and torso. Over that wire she has wrapped aluminum foil to bulk out the shape of the horse and human body. Then over the foil is masking tape. If you look closely at her tail, you can see its not white clay, but rather tape.  


I had planned on her tail being in mid-swish, not touching her body at all. That will need another skeleton of smaller wires that will eventually be stuck into and glued into that foil taped mass of tail bone. 


Her legs might end up being a major problem. First off, I can see now, after months of not laying eyes on her, that they are a touch too long. This might be good because I'll need more wire coming down to help anchor her to a base, plus support for hooves. The upraised front leg needs a major bone adjustment, and its too far out to the side. 


I also see now her back is WAY too long. That will need to be fixed too.


Keep in mind though, she's wrapped up in plastic wrap, and has been laying on her side since November 09 - and its now May 10. I'm pretty sure some major damage has been done by now, and when I get ready to take her out, I'll have to do some damage control. 

Thursday, May 20, 2010

Bleh

Just updating because I can. No space to work, so nothings gotten done.

Have been reasearching a LOT lately into the model horse world, customs, resins, mold casting and making, and have gotten pretty psyched about going in that direction.

The dragon I started this blog with is currently wrapped in saran wrap, in a ceramic protection dish, up on a high shelf in my closet.

At this particular living location (Nope, won't call it home) I have No space, No room, and absolutely No privacy to get anything done. The dragon was started on the kitchen table last summer, and I had 5 kids constantly involved, wanting to play with MY professional clay. After a few days of trying to keep an eye on them and attempt to get work done, I got fed up and put it all away, and it hasn't come back out since.

My plans are still the same, just put on the back burner for a while. I have a very specific place I want to go artistically, and I'm going to use this semi-permanent down time to start gathering up materials and tools I will need. The financial strain won't be as great if I spread things out, I think. I picked up a like new dremmel from craigslist last summer for under $20, with the full accessories pack. Its somewhere around here, need to go find it.

Also collecting how to videos, searching out instructional manuals (One is $95 + shipping!), and the like.

This summer I WILL have a studio, I'm being promised by the long time male other half. He owns three of the above mentioned 5 kids. Will have to discuss studio access rules with him when the time comes.

Till then, this blog might turn into a few other directions, we'll see how that goes!

Until then, check out the other blog I write daily, which has a much better start than this one did!

Its a daily blog featuring horses up for sale on craigslist... and some of the dummest ones I can find. clhorseads.blogspot.com.

Happy spring!

Wednesday, August 5, 2009

WIP #1 - Green Dragon - Part 2 - Big Horns, Face Scales, Start of Body

Before I begin, I will mention that the following is entirely my own work. I used other artist's tutorials as guides and basic how-to instructions only, making my own interpretations and changes as I saw fit. All of the following instructions, pictures, and teachings are owned solely by me, and may not be used without permission from me. Copyright laws will be enforced.

At the end of Part 1, I left off just after inserting 3 facial horns, adding more detail to the eyes, and snout.

After adding in the top horns, I did the same thing in his mouth for teeth. Chose 4 of my little teeth/horn/claw bits that matched, and used the same method to insert them. I only put in 4 total, because I didn't want a huge mouthful of teeth. As the artist, that was my choice ;). I also took two small balls of the pinkish clay mix I used for the underside of his mouth/tounge, and using the rounded end of a tool, gently flattened them in his nostrils.

I wasn't quite done with the details on the face yet, but wasn't entirely sure what to do. I was thinking ahead to the rest of his body, and what I was going to do to texture in some scales. I had seen several ideas and was tossing them around, combinations of them, and leaving his skin smooth.

What I ended up doing was a bit of an experiment... but hey, this whole sculpt is one big experiment! I took another small, and I'm talkin', TINY, snake of translucent sculpey, and flattened the bottom against my work tile. The whole thing was maybe 2 inches long, and barely 1/16th inch in diamater. I wanted very, very small scales to layer on his snout to give more dimension, interest, and reptilian feel.

Photobucket

Turned out rather cool! It took a LOT of time to do even just this little bit, and keep in mind there's 2 sides. So what I did on one, I repeated on the other. They don't match, but that makes it more real, IMO.

My next step, was to figure out what type of "Big Horns" this guy was going to have. Surprisingly enough, there was no argument here from the dragon in question when I decided to use a piece of extra wire snipped off from when I was making his armature. This piece was about 2 inches long, and had been wrapped around another piece and then removed, so it was quite twisted and curled in a wonderful way. I took another piece from the spool and started randomly curling and twisting it so it was different in shape, but similar in style to the original one. I cut it to as close to the same length as the first, and proceeded to cover them with clay.

photobucket

This was actually somewhat difficult as the clay would not stick very well to the wire, so after pulling the clay off a few times I coated them in a very thin layer of TLS, re-ran the clay through the pasta machine to get it very soft and pliant, and started again. I'm using untinted SS for the horns.

Well, that made it worse. The TLS just made things slip and slide more. So, the clay came off the wire again, and I wiped down the wire with some rubbing alchohol and q-tips, and conditioned the clay ... again.

That time was a charm as I tried a different way of things. Instead of creating a snake with a big slit to insert the wire into, I made a small sheet, and wrapped it around the wire like a blanket. As I pushed the clay to follow the twists and turns of the wire, it started working and sticking much easier. Maybe it was the alcholol bath to? I'll have to try that again next time I cover bare wire with clay.

Once the wire was completely covered, save for a small bit on the bottom end to insert into the dragon's head, I took one of my favorite tools, the end of a cheap kids paintbrush, and started to texture the clay slightly by beating a bit with the paintbrush. I didn't want the clay smooth - I wanted craters and bumps and ridges and a very natural looking texture.

Afterwards, I was looking at them, thinking the texture was great, but the color was BORING. So out came the Pearlex powders. I had never used them before, and this seemed like as good a time as any to try them out.

Photobucket

As you can see, they turned out quite colorful! They went in the oven for 10 minutes to bake while supported by the ever handy empty & trusty toilet paper roll. (Sometimes its the best thing to use to prop things up while baking. I've seen them used to hold up all sorts of sculptures! *giggle*)

When the horns came out and were cool, I gently rubbed my finger against them to see if the powders would rub off ... and not a single fleck came off. So, while I had the powders out, I also dusted the newly formed facial scales with some of the light green sparkly powders for more color dimension. Since they were not going to rub off, it opened up all sorts of other uses for them.

So now that we have our horns, how to attach them to our dragon's head without it falling nose first into my work surface, and getting himself a broken nose?

Photobucket

Ah. ;) Gotta love that empty TP roll. It was a bit tricky getting the horn to stick into the head, so another stab with a long needle tool, some more TLS (just a tiny squeeze), and some more translucent sculpey rolled around the base to help secure the rather large, heavy horn. This method also allows for some repositioning after its in, just have to be careful to keep the clay 'donut' around the base from gaping open.

The above picture shows the horns in two different stages of attatchment. The horn on the left is already attatched with the above method, and the one on the right shows the build up of clay to mimic a large bony growth to support the horn much like a elk or large deer would have. There is a small, but deep, hole in the center of that top green disk which the wire fits into, and then the donut of translucent clay wraps around the base of the horn. Clear as mud? Good.

Now at this point, there wasn't much else I wanted to do with the head. It was almost 8 days work (after dinner, most nights, till between 1-3 am) to get to this point, and I was about ready to move on to the body. But first we have to bake it. I added a touch more TLS over the eyes to give them more depth and gloss, as well as brushing the entire head with the green pearlex powder for shiney scales. I also finished the texturing of the rest of his head by taking the ball point stylus and gently tapping it against the clay for little craters and hills.

Photobucket

If you look closely enough, you will see that the 'body' is taped with masking tape to a glass baking dish to help support the head and horns. I also had to tape the toilet paper rolls to the glass to keep them from slipping. I had to adjust the horns some at this point to make sure they were in the perfect places, as they tended to move around a bit, not to mention droop from the weight. I baked him for 30 full minutes at 270, then let him cool in the oven.

The next step, which I didn't photograph very well, was to cover the rest of him in his green clay.

Photobucket

Photobucket

I added a spine ridge for future decorations, and smoothed the clay out.

This is as far as I have gone so when I work on him more I'll update again.